Set up a preference center
Improve communications with your contacts by giving them an easy way to manage how you contact them and what data you hold about them.
The preference center allows contacts to:
- Change their details
- Change their marketing preferences
- Change the lists that they belong to, meaning they can unsubscribe from specific lists instead of unsubscribing from all of them — opt down instead of opt out.
After you've set up the preference center, contacts select a link in one of your email campaigns to access it.
Use the preference center
When a contact wants to make changes in the preference center they must select the link in your campaign, edit their preferences, and then select Save your preferences.
In the preference center, contacts see any contact data fields, preferences, and lists that you set as public in your account. Anything set as private is not visible.
If the contact wants to unsubscribe from all marketing email, they can select Unsubscribe from all email in the preference center.
Set up the preference center
- Set all contact data fields, preferences, and lists that you want to show in the preference center to public. By default, contact data fields and lists are private.
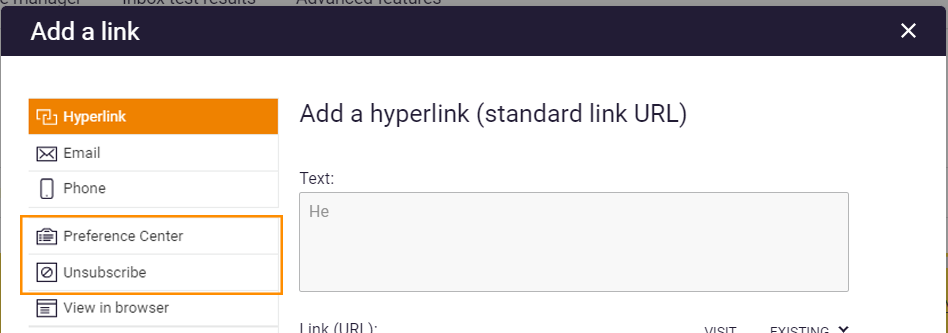
- Insert a link to the preference centre in your email campaigns. There are two ways to do this.
- Send contacts to the preference center when they select Unsubscribe.
- Insert a separate preference center link in your email campaigns.
Set contact data fields, preferences, and lists as public
Contacts can edit their details, preferences, and the lists they belong to by changing the values in their contact data fields and by selecting and de-selecting preferences and lists.
To show contact data fields, preferences, and lists in the preference center, you need to set their visibility to public.

Make sure names are user friendly
After you set contact data fields, preferences, or lists to public, your contacts can see them when they access the preference centre. Make sure that you use names your contacts can understand.
Set contact data fields to public
- Expand the User menu and go to Settings > Contacts > Contact data fields.
- Select the Properties icon of the contact data field that you want to set to public.
Contact data fields are spread across two tabs: Default data fields stores the contact’s personal details, and Custom data fields stores all fields created by you or your team. - Expand the Access drop-down menu and select Public.
- Select SAVE.
Set preferences to public
- Expand the User menu and go to Settings > Contacts > Marketing preferences.
- Select the preference name that you want to set to public.
- Expand the Access drop-down menu and select Public.
- Select SAVE.
Set lists to public
- Go to Audience > Lists.
- Select the Properties icon of the list that you want to set to public.
- For Visibility under the Settings tab, select Public (show in preference center).
- Select SAVE.
Send contacts to the preference center with Unsubscribe
To send contacts to the preference center when they select Unsubscribe in an email campaign:
For new accounts, contacts are sent to the preference center by default when they select Unsubscribe.
- Expand the User menu and go to Settings > General > Account settings.
- Under the heading Unsubscribe and preference center settings, expand the When a contact clicks ‘unsubscribe’ drop-down menu and select Show the preference center chosen below.
- To display the default preference center, expand the When a contact wants to change their marketing preferences drop-down menu and select Show the default preference center.
If you have a custom preference center, then select one of the other appropriate choices. - Select SAVE SETTINGS.
Preference center links
You can include both Unsubscribe and preference center links in your email campaigns, where the Unsubscribe link removes the contact from all lists and the Preference center link allows them to edit their preferences.
To allow both Unsubscribe and Preference center links in your campaign:
- Expand the User menu and go to Settings > General > Account settings.
- Under the heading Unsubscribe and preference center settings, expand the When a contact clicks unsubscribe drop-down menu and select Show the unsubscribe page.
- Select SAVE SETTINGS.
This enables the Preference center link option in the email EasyEditor, in addition to the Unsubscribe link option.
Insert a preference Centre link
Learn how in Add a preference center link to your campaign.
If you send contacts to the preference center when they select Unsubscribe, you can't also insert a separate link to the preference center.
Preference center translations
The default preference center is available in 20 different languages. We display to each of your contacts a preference center that has been translated into the language that their browser is set to (if that language is available).
Read more in Display the Unsubscribe or Preferences page in your contact's language.
Related Articles
Contact Marketing Preferences
Contents Creating and managing marketing preferences and categories Viewing and editing contacts' preferences Viewing contacts opted into a preference Using preferences in segments Sending a campaign to preferences Using preferences in a signup form ...Add and remove suppressions from a list
Contacts can choose to unsubscribe themselves from your lists if you provide them with this option through use of a preference centre, but sometimes you might want or need to suppress contacts from a list yourself. You can do this using a file ...OPENMOVES GDPR PROGRAM
FAQs about what OpenMoves is doing as data processor to help our customers comply with GDPR This document is downloadable as a PDF here. General Is OpenMoves GDPR compliant? Like you and many other businesses, we have an ongoing GDPR program and we ...General Data Protection Regulation (GDPR)
To safeguard the confidentiality, integrity and availability of data, the OpenMoves platform is hosted on Microsoft Azure. In the US we utilize the East US 2 region, with data backed up to the Central US region. European data is held in the West ...Segmenting your contacts - Getting started
What are segments? Good email marketing relies on sending relevant content to your contacts. To simplify the process of finding the right contacts for a campaign, we have two types of lists for managing contacts: address books and segments. Address ...